How I made my first video ad with AI tools.
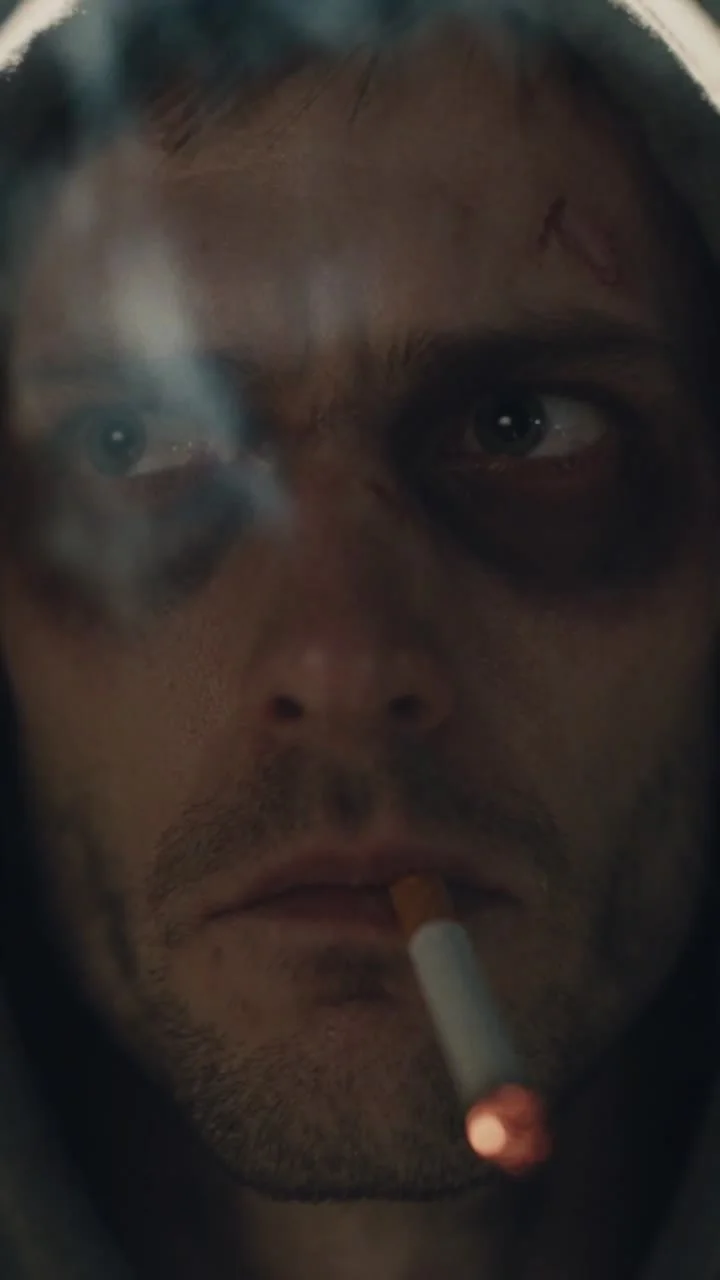 0:45
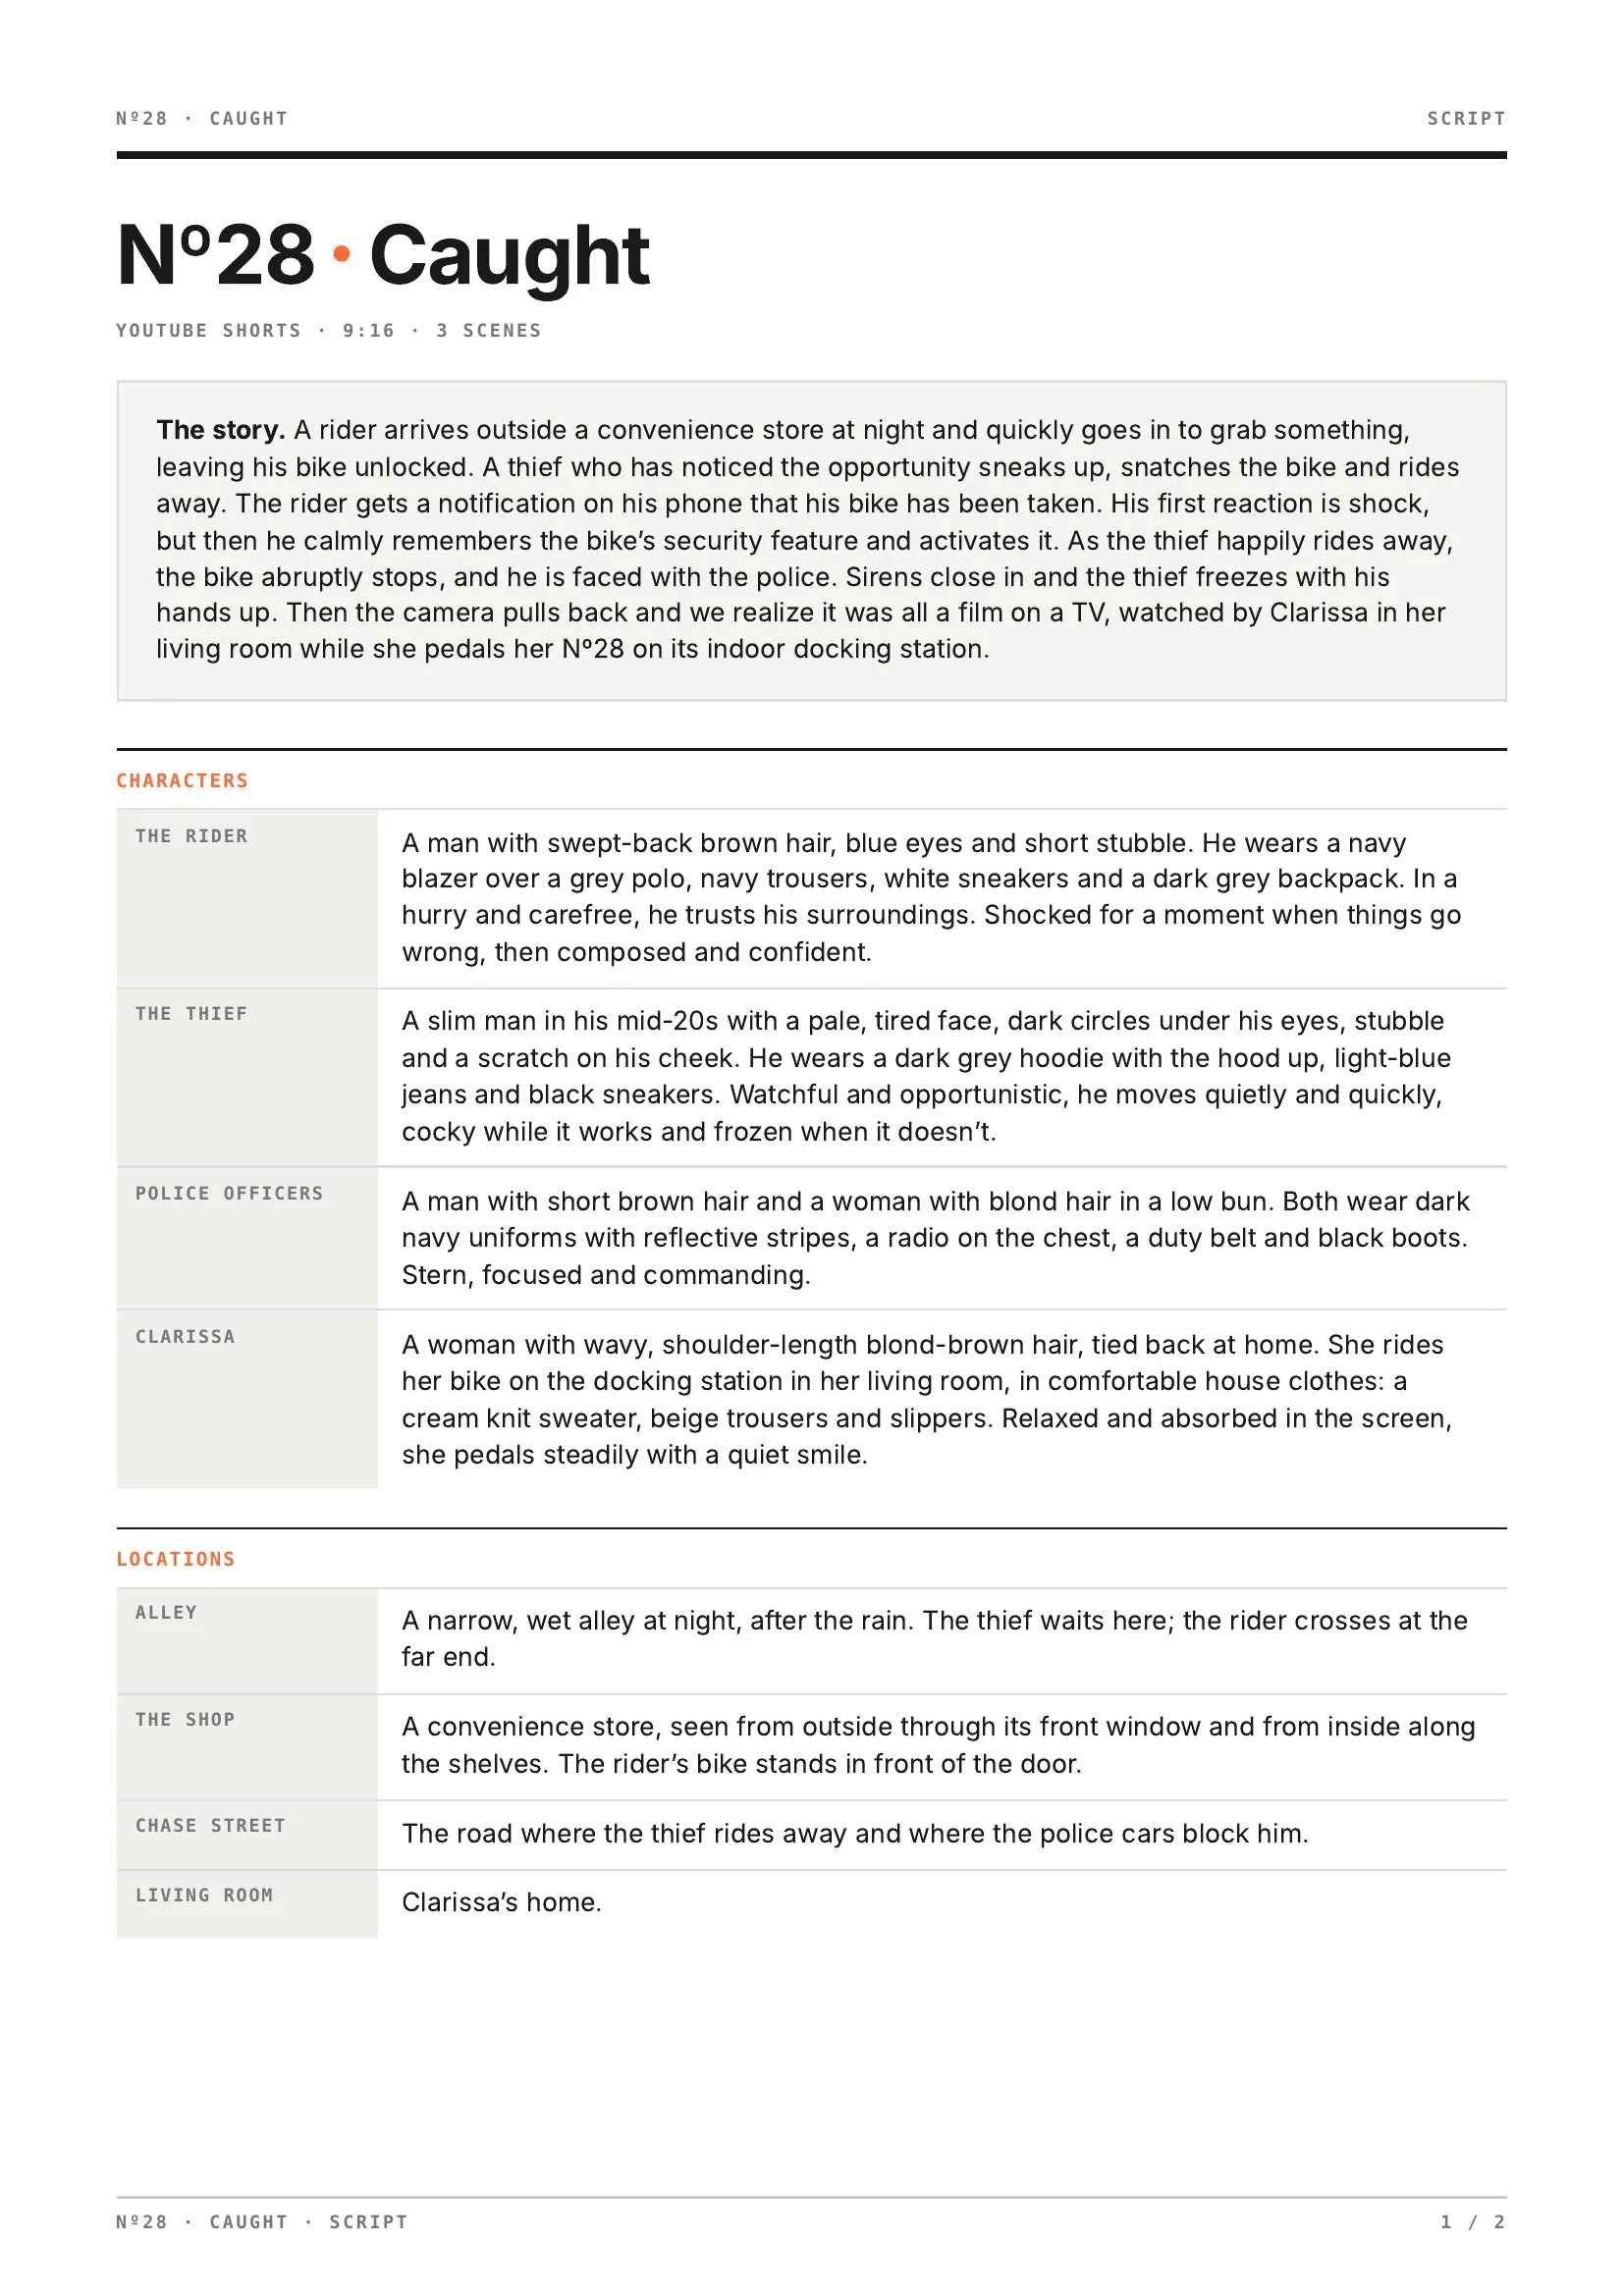
This is the full story behind Nº28 Caught, a 45-second AI-generated Short for the fictitious BicycleWorld Nº28 e-bike, made for my Digital Marketing Manager course. It started with an assignment: a six-panel storyboard for a YouTube Shorts ad that a production company could use as the plan for shooting the video. The ad was meant to build awareness for the launch of the Nº28 among busy city commuters, with Clarissa, our buyer persona, as the audience.
The idea for the film was already set in that storyboard: to bring the bike’s two standout features into one story, its security feature and its indoor docking station. The assignment only asked for the storyboard, but I decided to make the real video myself, as a personal challenge.
The film took two days, with Seedance 2.5 for the clips, Seedream 5.0 Pro for the stills, ElevenLabs and Claude for the score, and CapCut Pro for the edit. Here I walk through the whole process in order: the script and storyboard, the stills and character sheets, the clips, the cut and the score, and then what I learned and what I would do differently next time.
Planning phase
The idea came from a course assignment: a storyboard for this video ad. My first move was to generate clips straight from the stills I had made for that storyboard. Ten video generations later, it was clear this wasn't going to work. So I stepped back, went through my notes, did some research, and decided to start over and build the process on a stronger foundation.
Die Idee kam aus einer Kursaufgabe: ein Storyboard für diese Videoanzeige. Mein erster Schritt war, Clips direkt aus den Stills zu generieren, die ich für dieses Storyboard gemacht hatte. Zehn Videogenerierungen später war klar, dass das so nicht funktionieren würde. Also bin ich einen Schritt zurückgetreten, habe meine Notizen durchgesehen, recherchiert und beschlossen, noch einmal von vorn zu beginnen und den Prozess auf ein stabileres Fundament zu stellen.
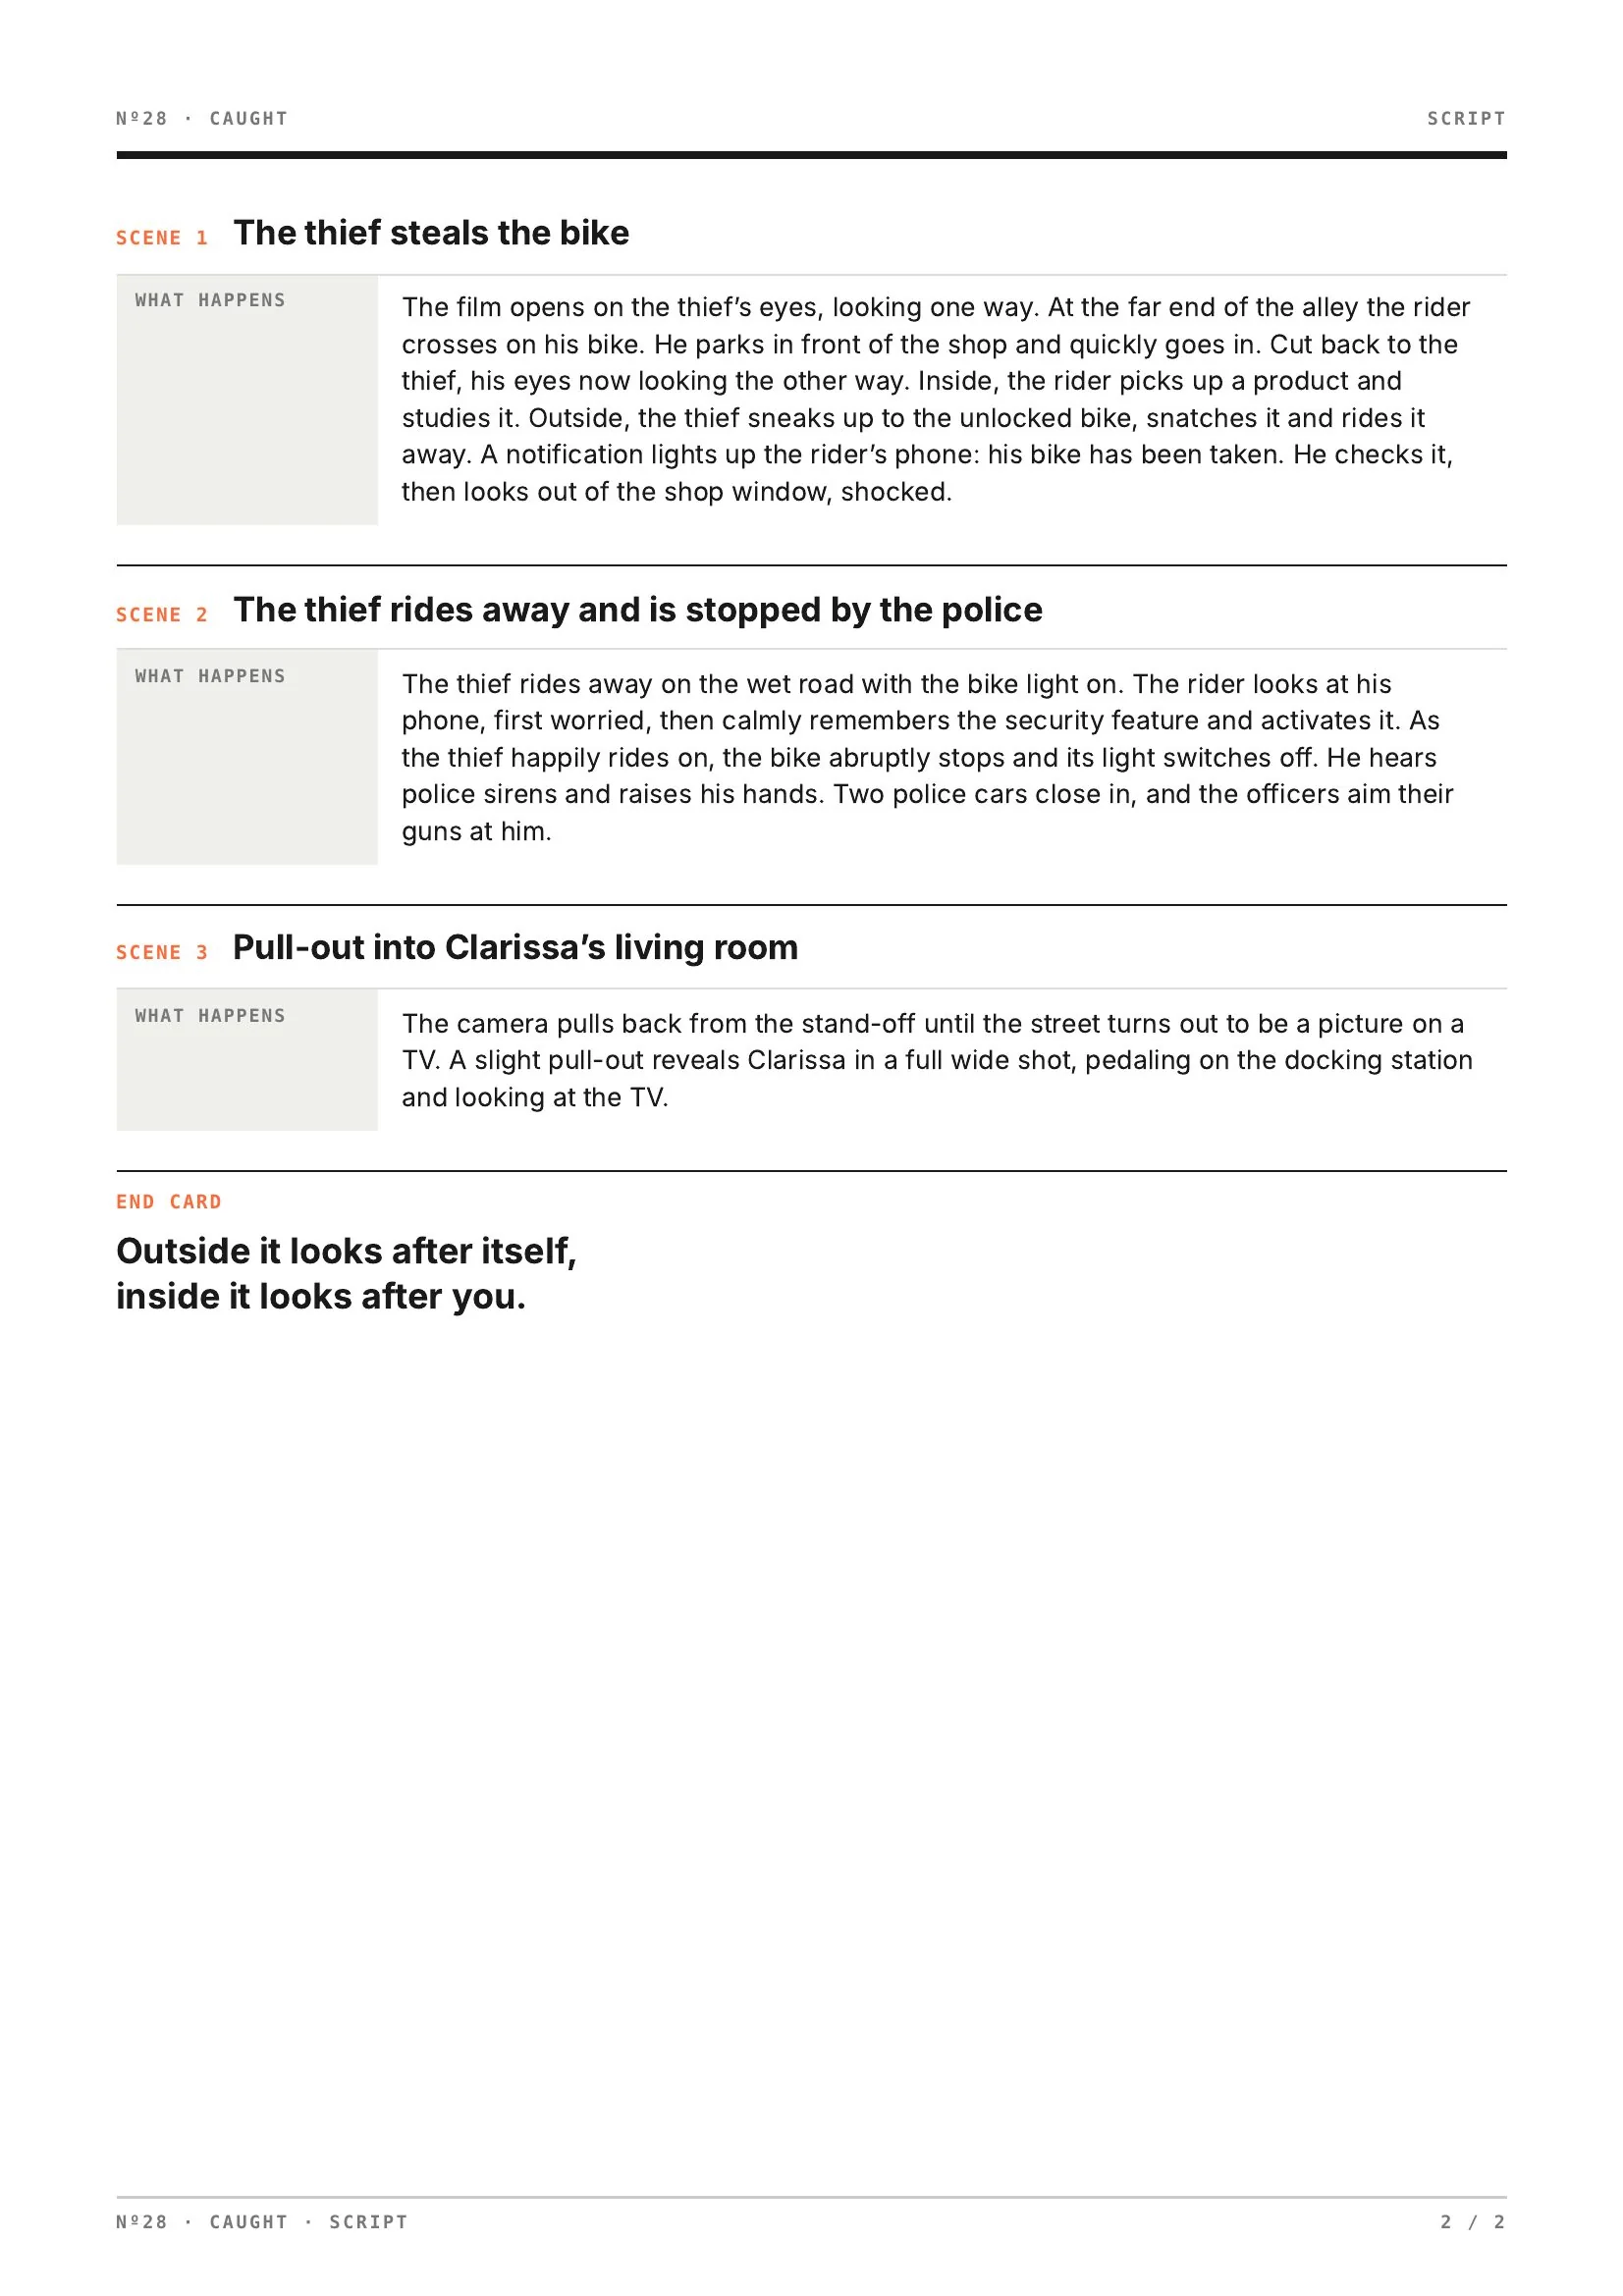
That foundation was a script, which I didn't have yet. Writing one is familiar ground from my video production background, and with Claude alongside, it came together quickly.
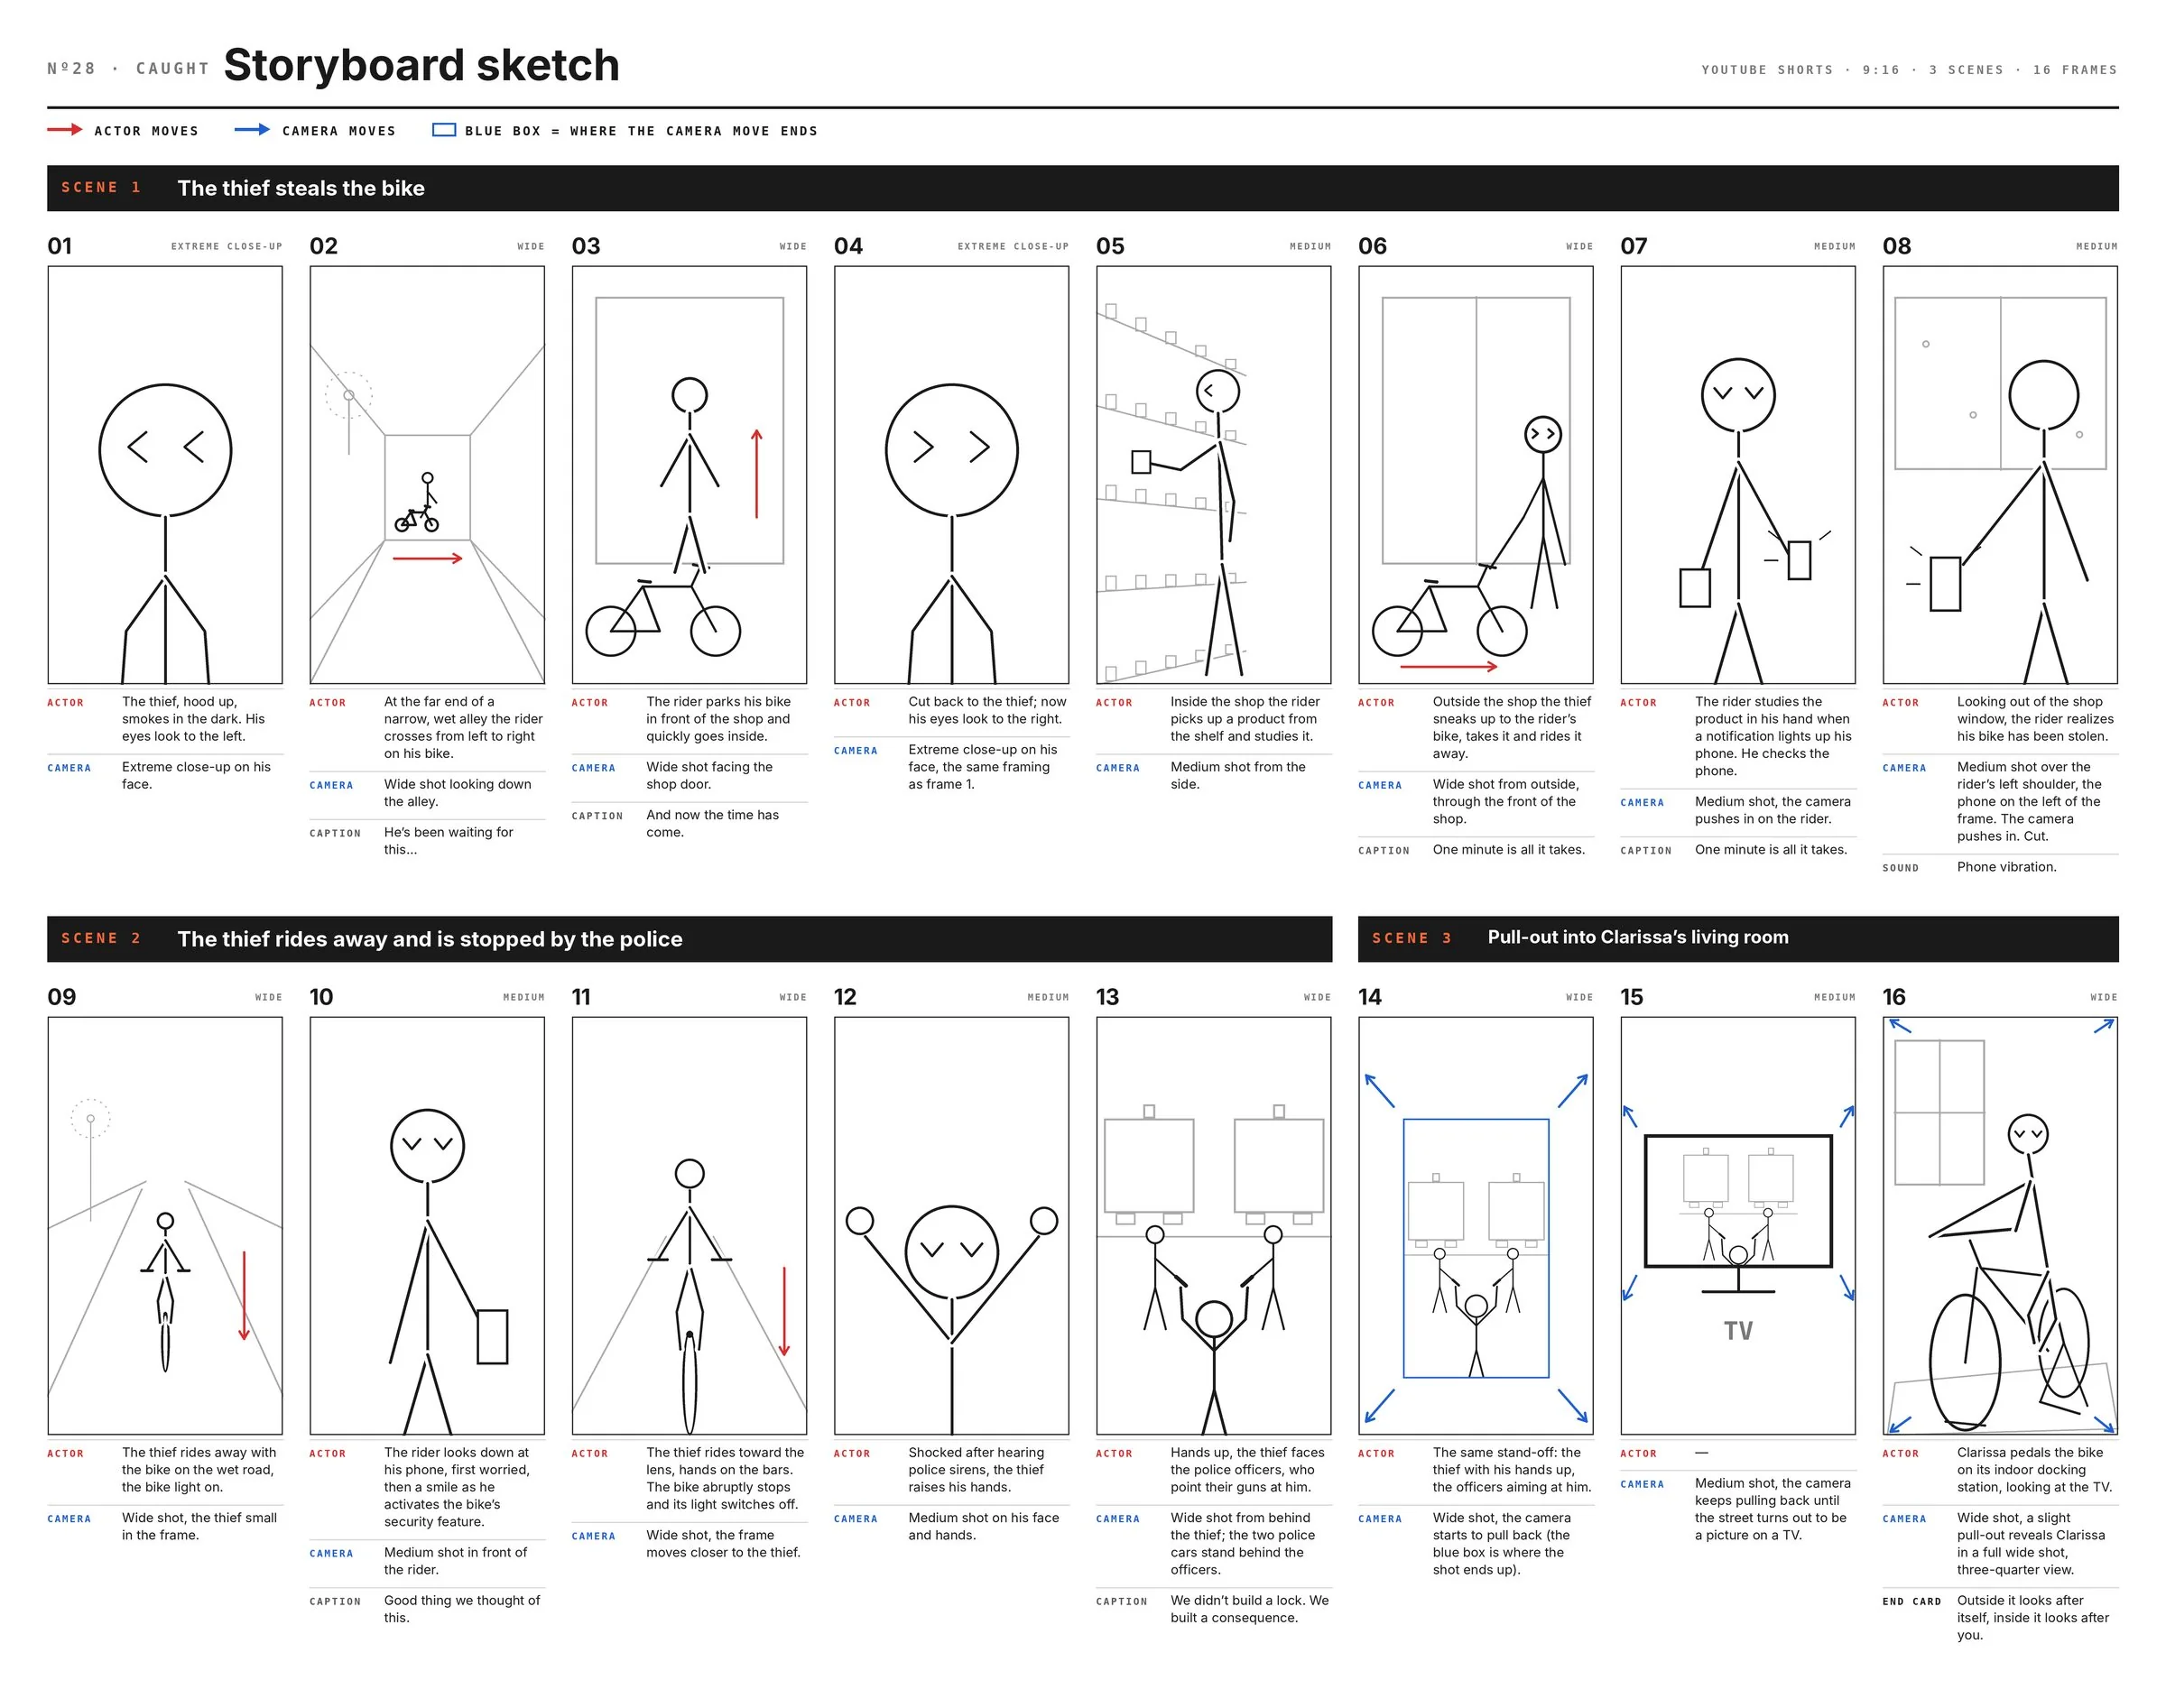
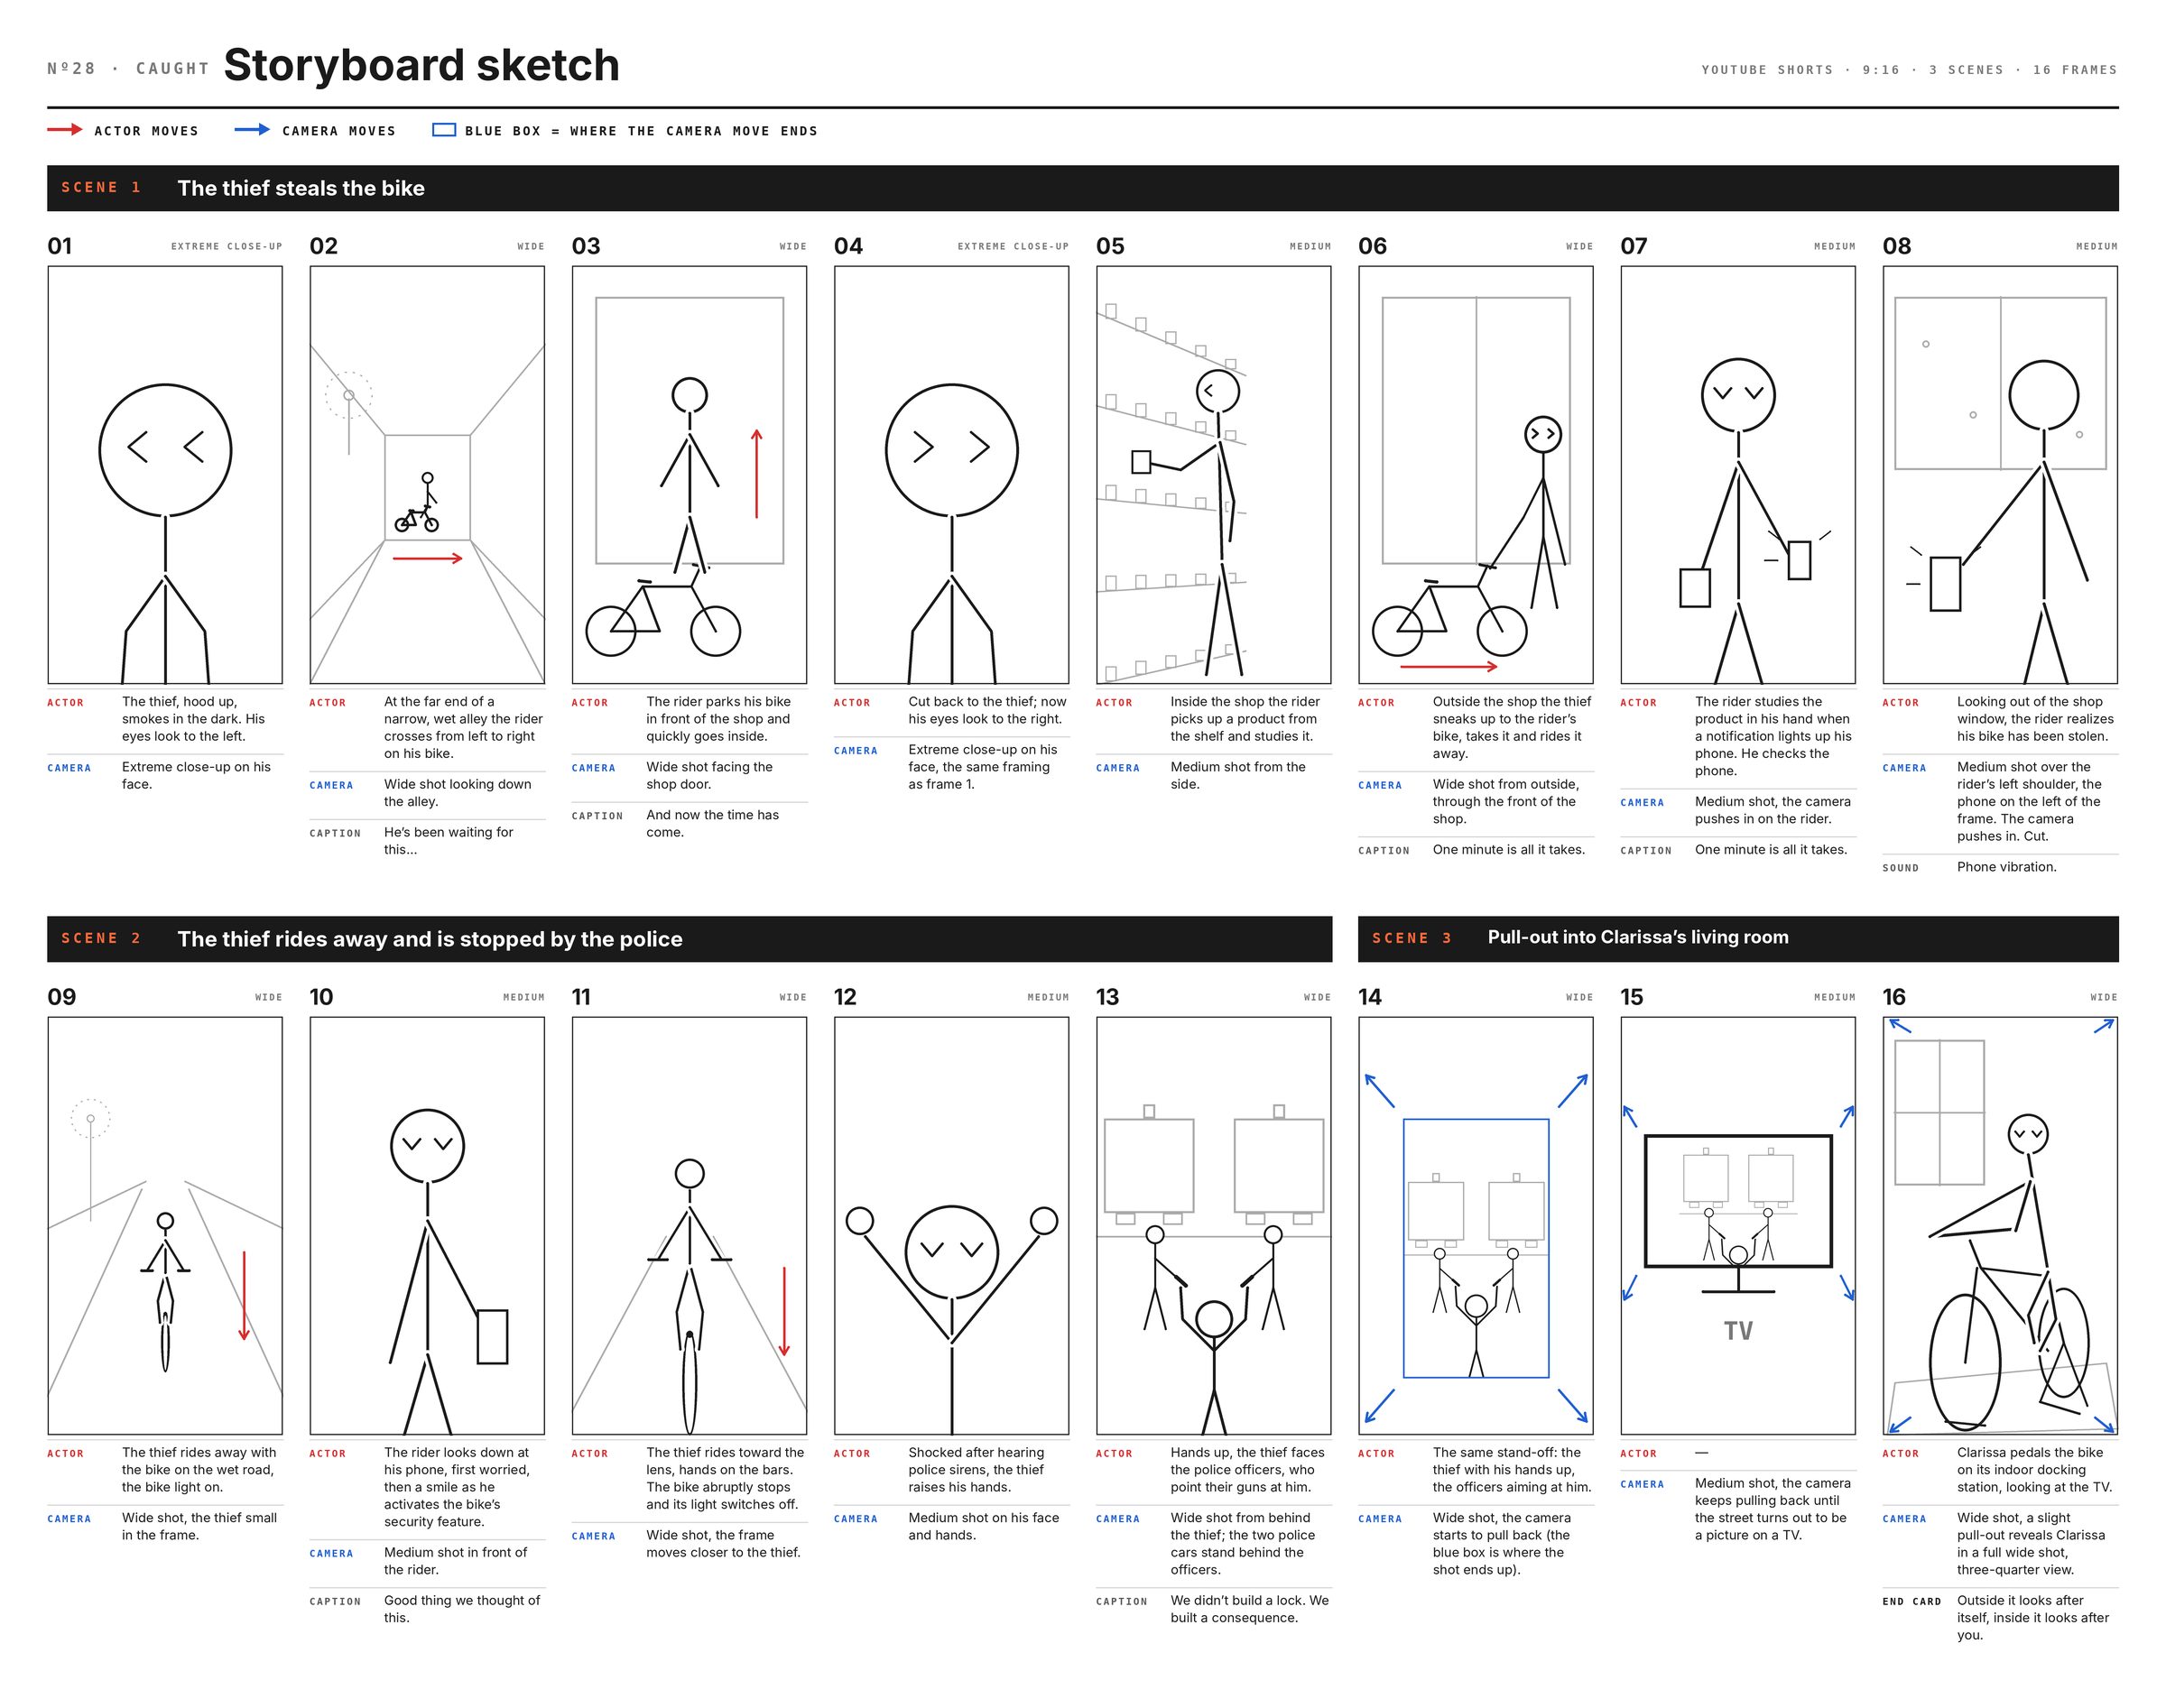
Next came a storyboard that could actually be used, built from the script. The one I had sent in for the assignment was missing many of the shots I needed to generate the clips. I'm no sketch artist and have always been a fan of circles and sticks, so I had Claude draw it the way I would draw it myself. I kept it simple and focused on the beats, the action and the camera angles.
Als Nächstes kam ein Storyboard, das sich wirklich benutzen ließ und aus dem Script entstand. Dem Storyboard, das ich für die Aufgabe abgegeben hatte, fehlten viele der Einstellungen, die ich zum Generieren der Clips brauchte. Ich bin kein Zeichner und war schon immer ein Fan von Kreisen und Strichen, also habe ich Claude das Storyboard so zeichnen lassen, wie ich es selbst zeichnen würde. Ich habe es einfach gehalten und mich auf die Beats, die Action und die Kamerawinkel konzentriert.
Generating the stills
Die Stills generieren
Every reference was built as a still before any clip, because a mistake is much cheaper to catch in an image than in a video. After the first attempt fell apart, I restarted with the whole reference kit: the rider, the thief, the locations, Clarissa’s living room, Clarissa herself, the Dock, the two officers and the police car.
Jede Referenz entstand als Still, noch bevor es einen Clip gab, weil sich ein Fehler in einem Bild viel günstiger finden lässt als in einem Video. Nachdem der erste Versuch gescheitert war, bin ich mit dem kompletten Referenz-Set neu gestartet: der Radfahrer, der Dieb, die Locations, Clarissas Wohnzimmer, Clarissa selbst, das Dock, die beiden Polizisten und das Polizeiauto.
Each character got one sheet: full-body views on top, face close-ups with the expressions the story needed below. The sheet is used only for how the character looks.
Jede Figur bekam ein eigenes Sheet: oben Ganzkörperansichten, darunter Gesichts-Nahaufnahmen mit den Ausdrücken, die die Geschichte brauchte. Das Sheet dient nur dazu, wie die Figur aussieht.
You may notice the locations are 16:9, although the video is 9:16. That is deliberate: a wide still shows more of the space, which leaves room for camera movement and actor direction and keeps the model from inventing the parts of the room it hasn’t seen, so I stay in control of the space. The shop took the most rounds. The front already had a clear entrance, and the main goal was a clear back door on the left, which took a couple of generations to introduce. The ceiling lights in the first version needed fixing too, as the slider below shows. In the living room, the ceiling lights came out scattered in the first generation. I fixed that by using that image as a reference and adding a short fixing prompt.
The Dock sheet taught me the most. In five of its six panels the front block stood on the same side as the roller, and the bike-on-the-Dock views built from it inherited the mistake. A reference that is wrong in one detail passes that detail on to everything made from it. The bike-on-the-Dock sheet exists for a similar reason: the living room shot needed a view that no reference showed, and when that happens the model invents one.
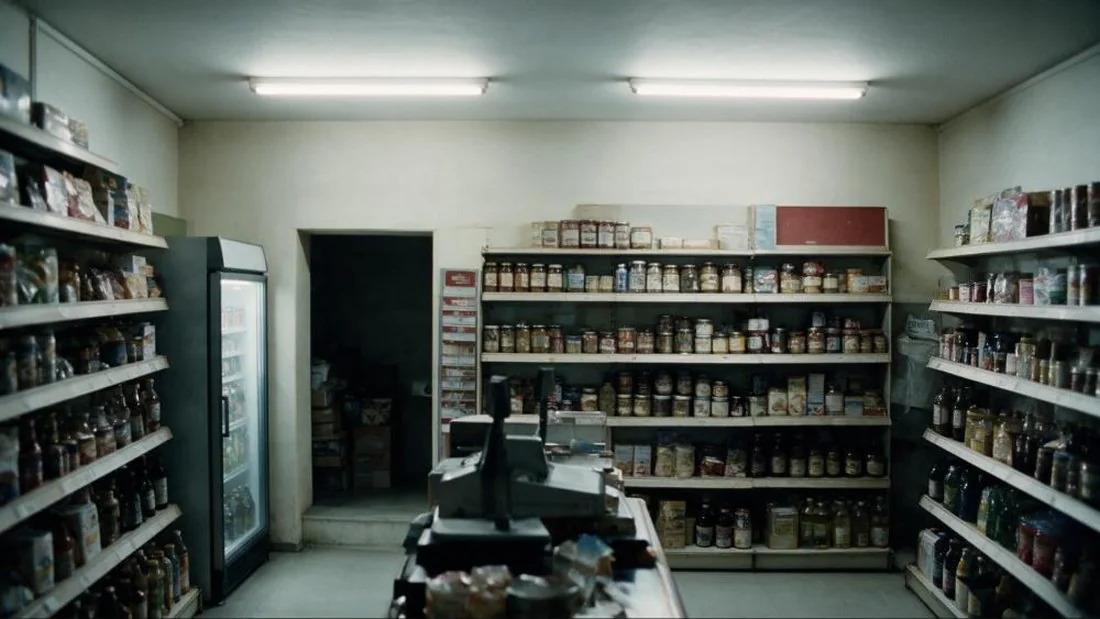
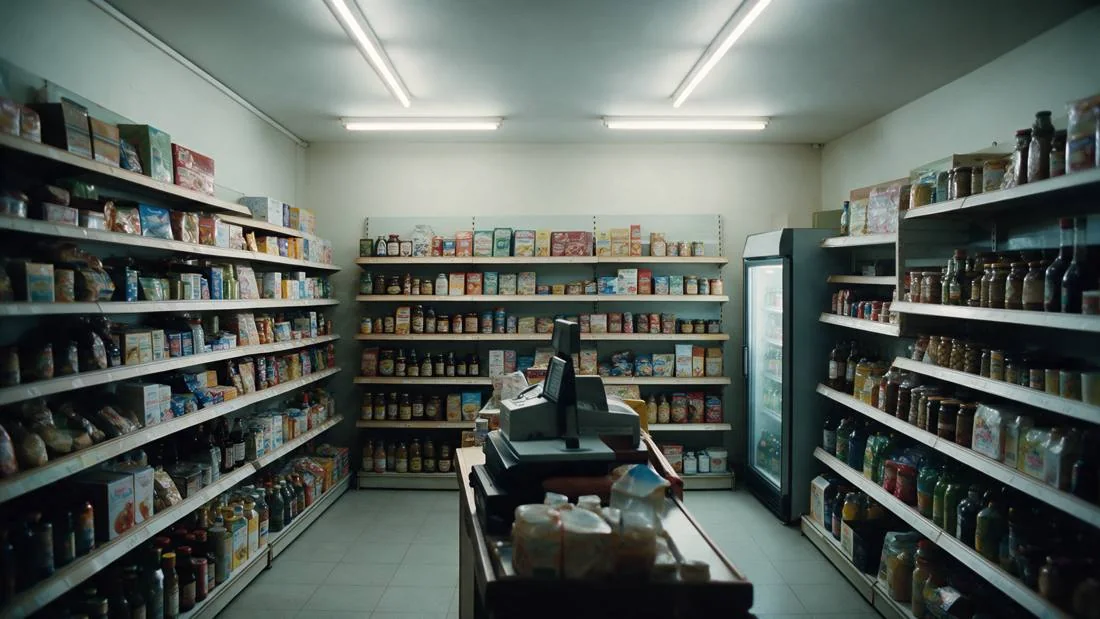 BeforeAfterShop
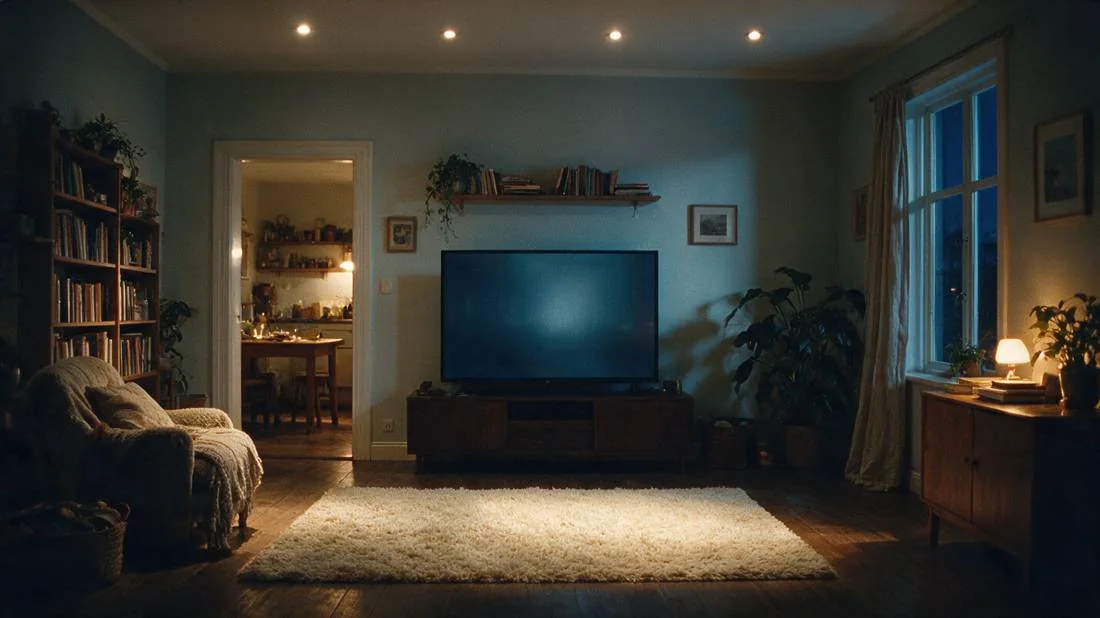
 BeforeAfterLiving room
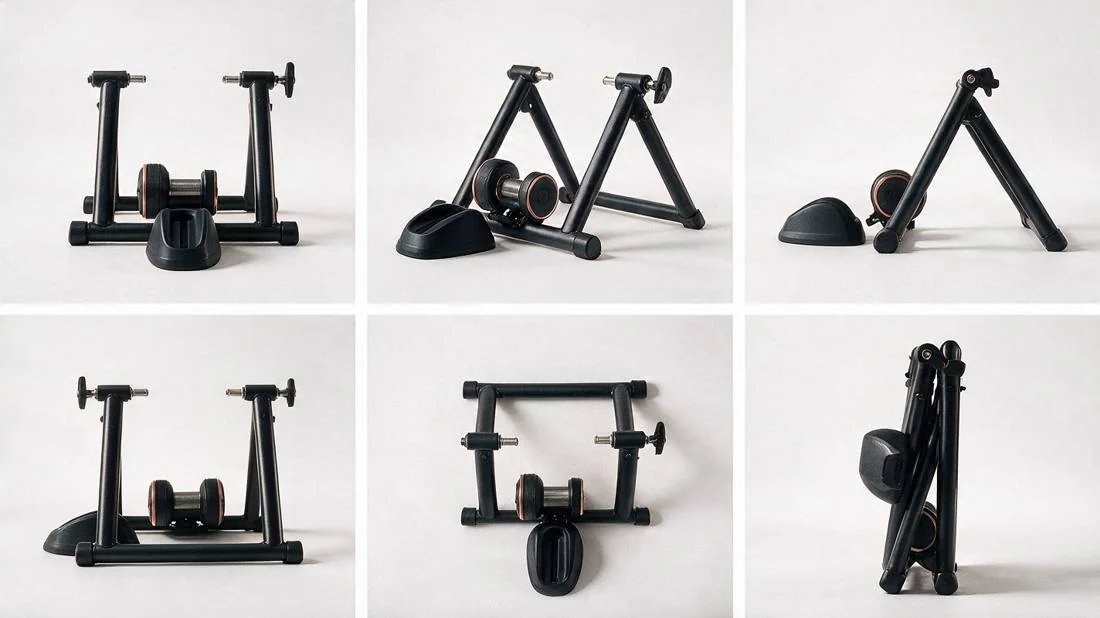
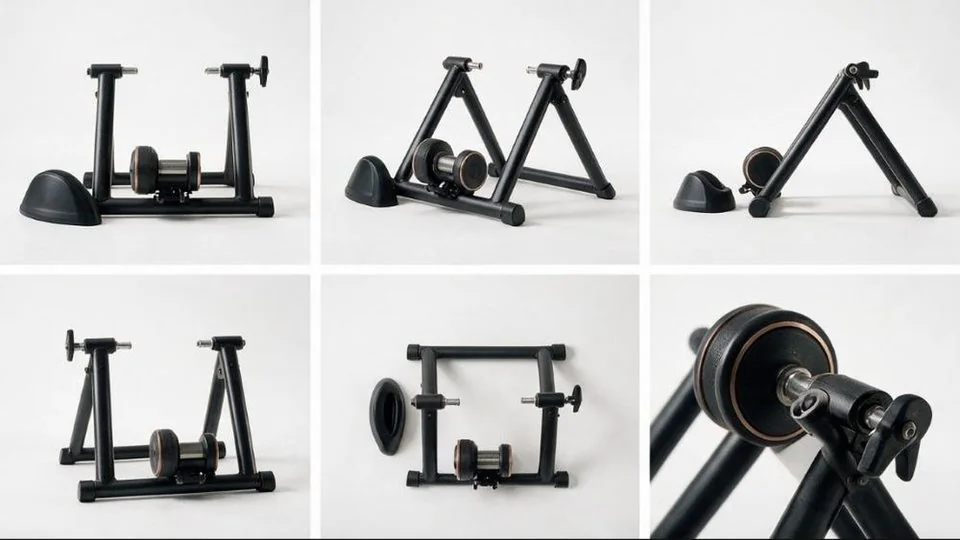 BeforeAfterDock
Every prompt uses the same blocks: references, subject, camera, lighting, style and avoid. In OpenArt, each reference is written as @image1, @image2 and so on, with one job each, which is how I learned they work best inside the platform. The text only adds what the references don’t show.
Making the clips
Die Clips machen
The research also pointed me to generating shot by shot rather than scene by scene. The goal was a 45-second video, so the plan was 5 to 10 second clips stitched together. Every clip is one shot built on strong references, so the model invents as little as possible.
The references already show the characters and the places, so the prompt doesn’t describe them again. It only carries the action and the actor direction. When a shot needs more than one camera angle, I write the angles as jump cuts inside the same prompt, the way I did on my previous reel, where the generations ran 20 seconds. Here the clips are shorter, which gave me more control over each shot.
Die Referenzen zeigen die Figuren und die Orte bereits, deshalb beschreibt der Prompt sie nicht noch einmal. Er enthält nur die Handlung und die Schauspielführung. Braucht eine Einstellung mehr als einen Kamerawinkel, schreibe ich die Winkel als Jump Cuts in denselben Prompt, so wie bei meinem vorherigen Reel, wo die Generierungen 20 Sekunden lang waren. Hier sind die Clips kürzer, was mir mehr Kontrolle über jede Einstellung gegeben hat.
My early prompts were long, with camera, actor and scene direction all in one, and credits were wasted on things the model ignored. What worked was one short action paragraph with no timestamps, because timestamps made the model invent things.
Meine ersten Prompts waren lang, mit Kamera-, Schauspiel- und Szenenanweisungen in einem, und Credits gingen für Dinge drauf, die das Modell ignoriert hat. Was funktioniert hat, war ein kurzer Absatz mit einer einzigen Handlung und ohne Timestamps, weil Timestamps das Modell dazu gebracht haben, Dinge zu erfinden.
I started with drafts at 480p in Seedance 2.5 on OpenArt. They cost little, and they were enough to check the choreography. Seeing the drafts work gave me the confidence to move on to 720p for the clips I wanted to keep.
Below are three examples of how the first scene was generated over several attempts: where I started, where I stumbled, and how it eventually got fixed. You won’t find the prompts here, because after a lot of trial and error they’ve turned into my own secret sauce. Every chef knows the dish speaks for itself, so the recipe card stays in my kitchen, but you can watch exactly how the cooking went.
Animating the storyboard stills
My first strategy was to animate the stills from the storyboard I had made for the course assignment. It didn’t work. The shop door was not generated properly and the whole action felt slightly off. Each clip was 7 seconds with no dynamic action or camera moves, so it was never going to get me to a 45-second video.
Everything directed in one prompt
These two generations are what made me change strategy. Their prompts were full of camera directing, actor directing and scene directing, and that was too much for the model to handle in 7 seconds.
Stills first, then short clips
These are the first generations after I had made the location stills and character sheets. Take 5 is a draft at 480p, and it showed me this strategy could work much better. So I took the risk and moved to 720p. Take 6 came out of that switch and was used in full in the final edit.
Cutting while generating
Schneiden, während generiert wird
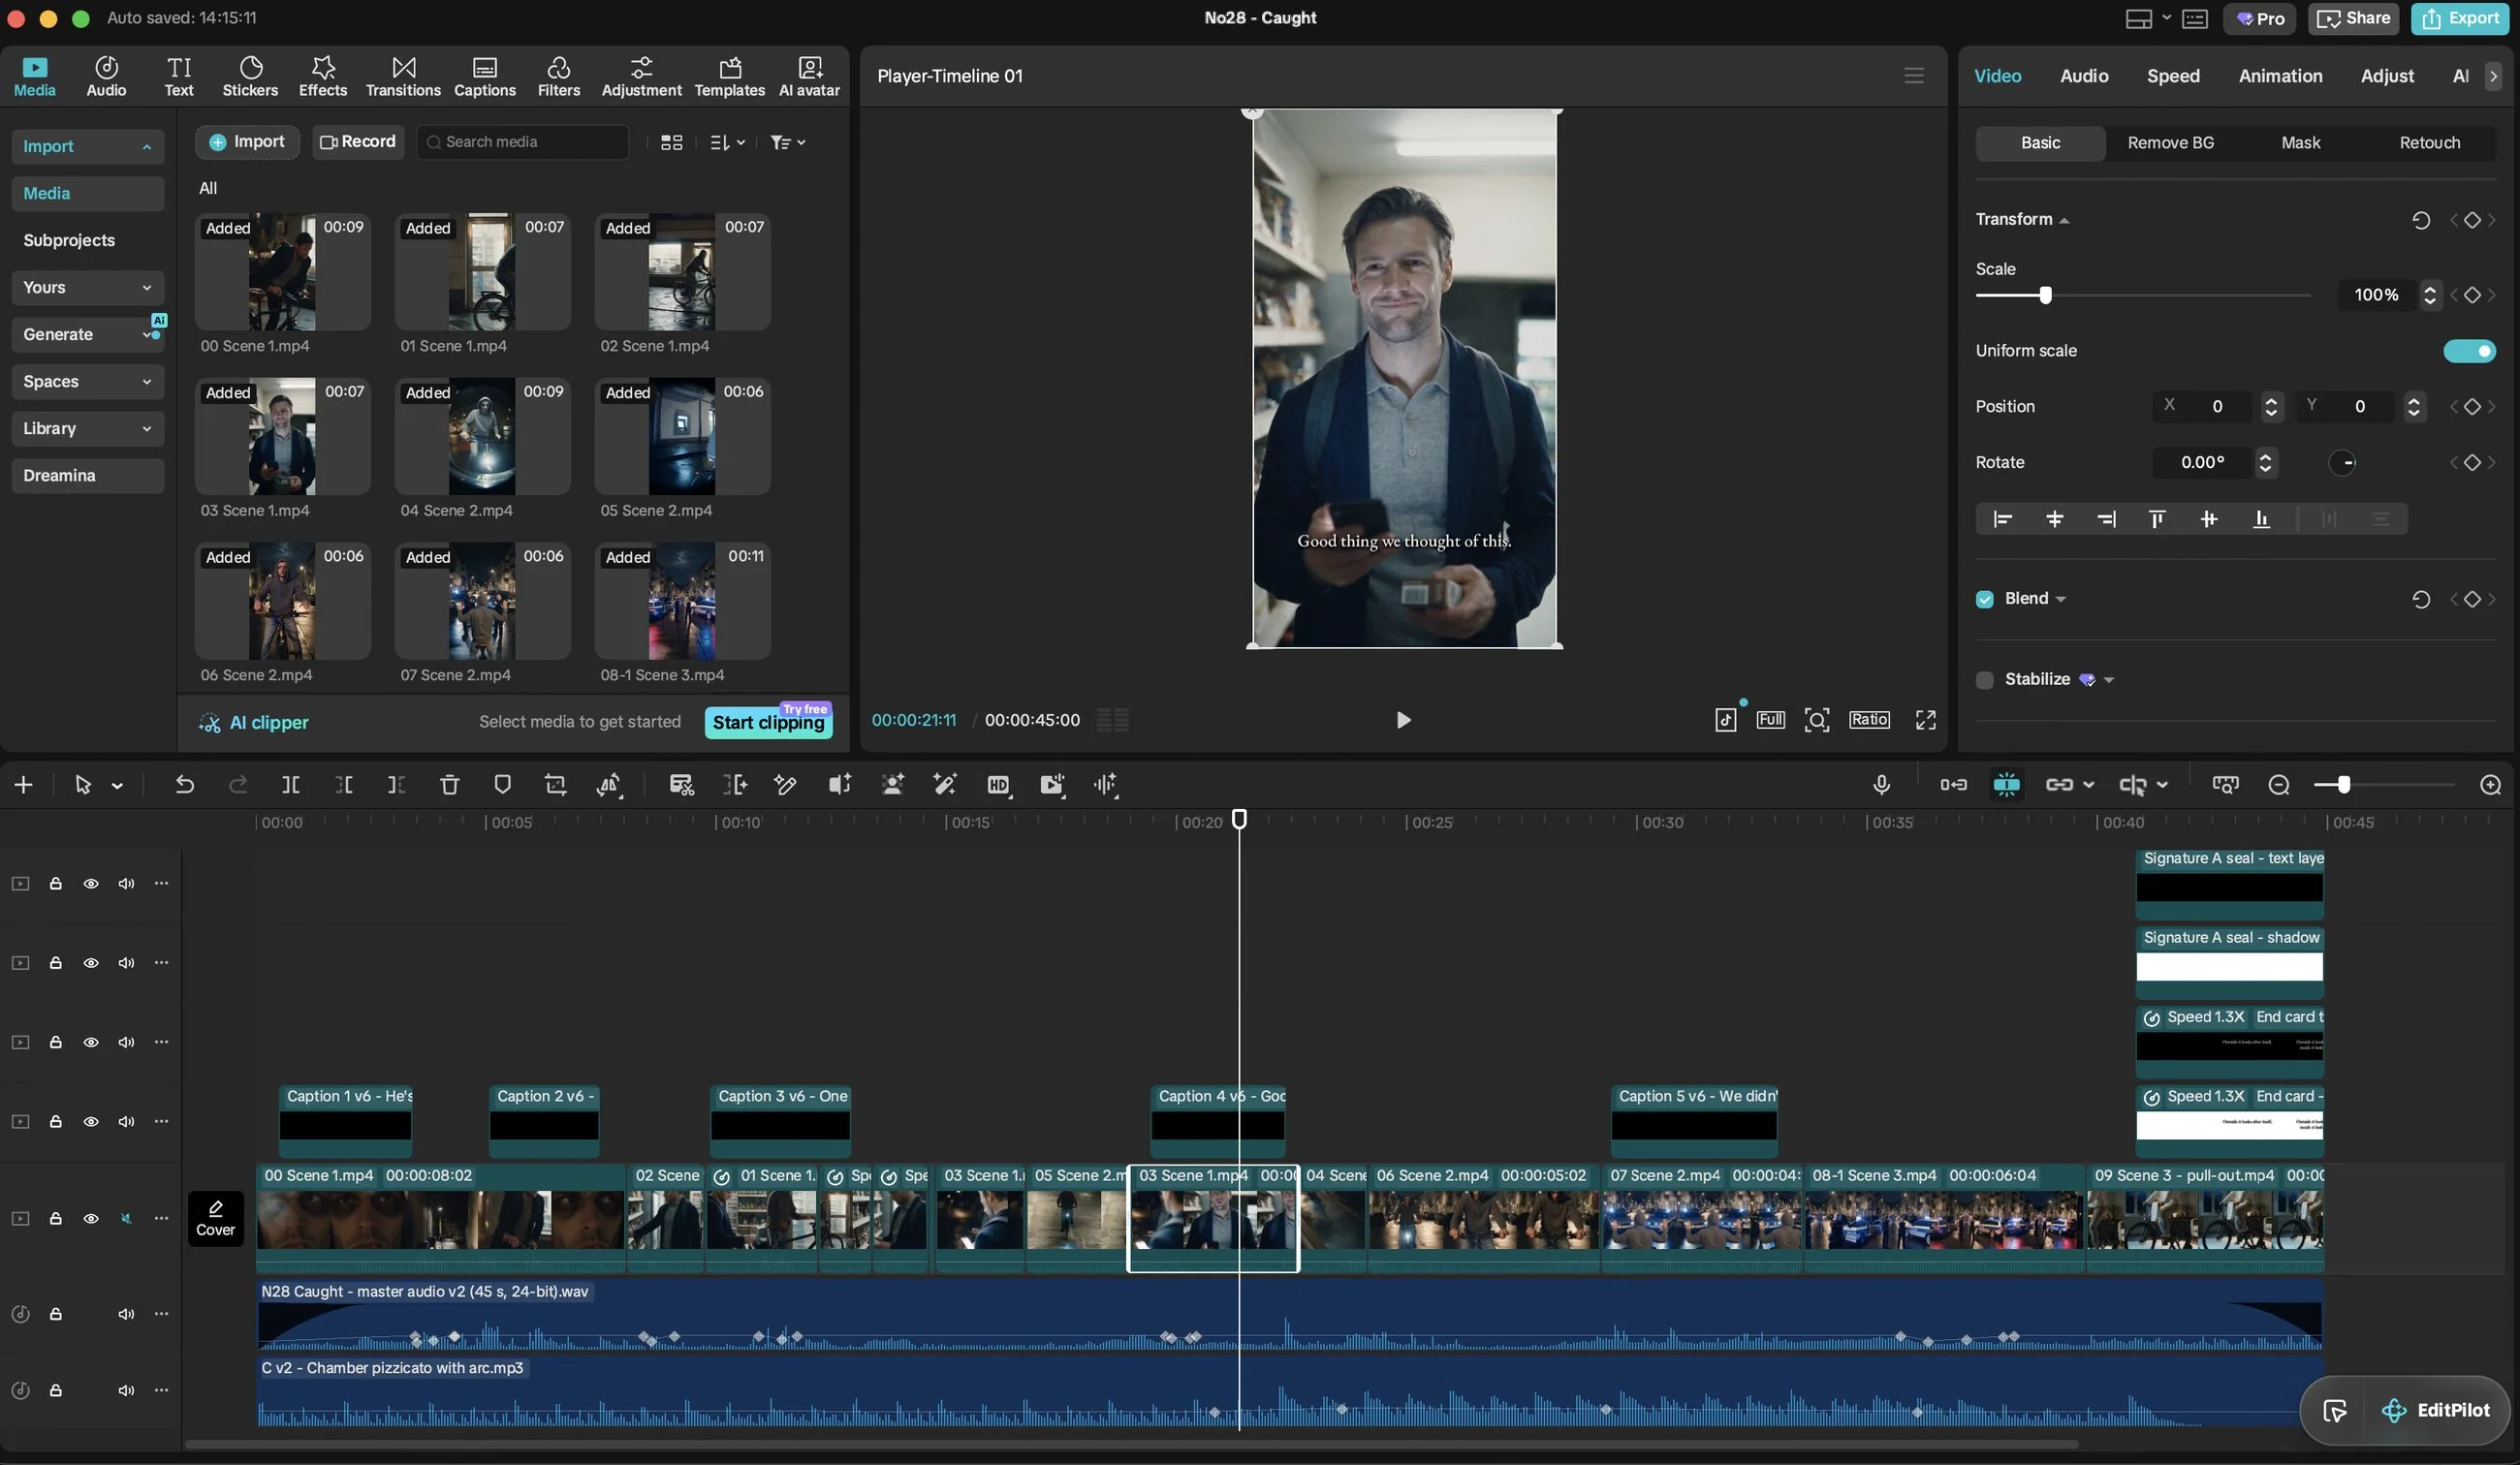
A rough cut was built while clips were still generating, so I could see what was missing and stop generating what I didn’t need.
Drafting a rough cut first is a habit from editing long-form videos. It proves the pacing before any polish, and here it showed that the 45 seconds were achievable. Everything else was built on top of that draft.
Once the pacing felt right, I levelled the audio, then added the sound design and the score, then the captions, and last the LUT and the finishing touches. The LUT was generated by Claude from my own specific instructions: a faded, matte, cinematic film look with a night grade, with slightly lifted blacks, softer highlights, colours about a fifth less saturated, cooler shadows and warmer highlights.
Als das Tempo stimmte, habe ich den Ton ausgepegelt, dann Sounddesign und Score ergänzt, dann die Untertitel und zuletzt die LUT und den Feinschliff. Die LUT hat Claude nach meinen eigenen, genauen Vorgaben erstellt: ein verblasster, matter, filmischer Look mit Nachtgrading, leicht angehobenen Schwarztönen, weicheren Lichtern, Farben etwa ein Fünftel weniger gesättigt, kühleren Schatten und wärmeren Lichtern.
The clips were generated at 720p, but the final export is 1080p, the standard vertical size for Shorts, Reels and TikTok.
Designing the score
Die Musik gestalten
The score was designed mainly with Claude. I described my idea, Claude wrote the prompts, and I generated the music in ElevenLabs, which is connected to Claude.
I started from the finished 45-second cut, so the music could be written for the film that actually existed. Claude went through the video and mapped its action into stages: calm and suspense, escalation, climax, release and resolve.
Ich bin vom fertigen 45-Sekunden-Schnitt ausgegangen, damit die Musik für den Film geschrieben werden konnte, den es wirklich gab. Claude hat das Video durchgesehen und die Handlung in Phasen eingeteilt: Ruhe und Spannung, Eskalation, Höhepunkt, Auflösung und Beruhigung.
I wanted three different versions to compare. I already knew one of them had to be alternative indie. The other two were Claude’s suggestions, and each of the three uses a different family of instruments.
After listening to all three against the picture, I chose the chamber one. Then I asked for a second version of it with the arc shaped to the film: quiet ticking at the start, a solo violin entering, a held breath, one low bass note, a fast build, and a slow fade at the end. Below are the three first options as they came out.
Nachdem ich mir alle drei zum Bild angehört hatte, habe ich mich für die Kammermusik-Version entschieden. Dann habe ich eine zweite Version davon angefordert, mit einem Spannungsbogen, der zum Film passt: leises Ticken am Anfang, eine einsetzende Solovioline, ein angehaltener Atem, ein tiefer Basston, ein schneller Aufbau und ein langsames Ausblenden am Ende. Unten findest du die drei ersten Optionen, so wie sie entstanden sind.
Indie alternative rock
The style I knew I wanted from the start.
Dark minimal electronic
A colder, more modern direction.
Chamber pizzicato
Plucked strings and a solo violin. This is the one I chose.
Captions for sound off
Untertitel für den Ton aus
Short-form video also has to work with the sound off, so I planned captions into the film.
Kurzvideos müssen auch ohne Ton funktionieren, deshalb habe ich Untertitel von Anfang an eingeplant.
The film carries five captions. Each one fades in over the picture, holds for a moment and fades out again. I added them in CapCut after the sound design and the score.
The lines are kept short, so each one can be read at a glance on a phone screen. Together they carry the story for anyone watching on mute.
Die Zeilen sind kurz gehalten, damit man jede auf einen Blick auf dem Handy lesen kann. Zusammen tragen sie die Geschichte für alle, die ohne Ton schauen.
What I would do differently
Was ich anders machen würde
- Character: 2 full-body poses plus one face close-up, instead of 6 different poses and 6 different expressions.
- Figur: 2 Ganzkörperposen plus eine Gesichts-Nahaufnahme, statt 6 verschiedener Posen und 6 verschiedener Ausdrücke.
- Prompts: keep the instructions simple and let the model do its job. With fewer directions to juggle, it works more efficiently and invents less.
- Prompts: die Anweisungen einfach halten und das Modell seine Arbeit machen lassen. Mit weniger Vorgaben, die es unter einen Hut bringen muss, arbeitet es effizienter und erfindet weniger.
- Test: 1 to 3 generations before asking for feedback, when credits permit it.
- Test: 1 bis 3 Generierungen, bevor ich Feedback hole, wenn die Credits es erlauben.
- Editing: step away from building short-form content out of my long-form knowledge and linear editing style, and explore a non-linear way of editing.
- Schnitt: weg davon, Kurzvideos aus meinem Langform-Wissen und linearem Schnittstil zu bauen, und eine nichtlineare Art des Schneidens ausprobieren.
- Script and storyboard: build the storyboard from the script, not the other way round. The one I started with came from the course assignment and was missing many of the shots I needed.
- Script und Storyboard: das Storyboard aus dem Script bauen und nicht umgekehrt. Das, mit dem ich angefangen habe, stammte aus der Kursaufgabe, und es fehlten viele Einstellungen, die ich gebraucht habe.
- References: make the whole reference kit before the first clip. Whenever a shot needs a view that no reference shows, make that reference first, because the model invents whatever it cannot see.
- Referenzen: das ganze Referenz-Set vor dem ersten Clip machen. Wenn eine Einstellung eine Ansicht braucht, die keine Referenz zeigt, zuerst diese Referenz erstellen, denn das Modell erfindet alles, was es nicht sehen kann.
- Stepping back: when the process felt like battling against the current, more generations did not help. A break, research and a closer look at my prompts did.
- Innehalten: wenn sich der Prozess anfühlte, als würde ich gegen den Strom schwimmen, haben mehr Generierungen nicht geholfen. Eine Pause, Recherche und ein genauerer Blick auf meine Prompts dagegen schon.
- Clips: leave generated clips as they come. Every post edit loses quality, so I would regenerate a clip rather than fix it in the edit.
- Clips: generierte Clips so lassen, wie sie kommen. Jede Nachbearbeitung kostet Qualität, deshalb würde ich einen Clip lieber neu generieren, als ihn im Schnitt zu reparieren.
- Sound: each clip comes with its own audio, and the joins between clips needed work, from gaps at the cuts to a siren that restarted with every clip. Next time I would plan the sound as one continuous track from the start.
- Ton: jeder Clip bringt seinen eigenen Ton mit, und die Übergänge zwischen den Clips mussten nachbearbeitet werden, von Lücken an den Schnitten bis zu einer Sirene, die mit jedem Clip neu startete. Nächstes Mal würde ich den Ton von Anfang an als eine durchgehende Spur planen.
- Credits: my first attempt was using them up fast, so I would budget from the start, with drafts at 480p and stills at 1K.
- Credits: mein erster Versuch hat sie schnell aufgebraucht, deshalb würde ich von Anfang an budgetieren, mit Drafts in 480p und Stills in 1K.
- Cost: roughly double my earlier reel, Mama Has Superpowers
- Kosten: etwa das Doppelte meines früheren Reels, Mama Has Superpowers
- The ad could also get variants: one concept with 3 to 5 different hooks and 2 to 3 formats.
Conclusion
The biggest lesson from this project is to take a deep breath before I start. These tools make it easy to get carried away, with new ideas to try and new ways to prompt, but every generation has a real cost, and not only in credits.
Here that was fine, because I was exploring in my own time and was the only one affected. In a professional setting, the same experimenting would need to be planned and managed much more carefully.
These models keep improving, and other creators keep finding better ways to use them, so I want to stay up to date with the changes and with how other people work. It also saves credits, and watching someone else test a concept first is one of the best ways to understand how to apply it in my own projects.
Every test, every challenge and every failed attempt taught me something. With each one I am getting better, which is why I keep pushing myself to learn these tools.